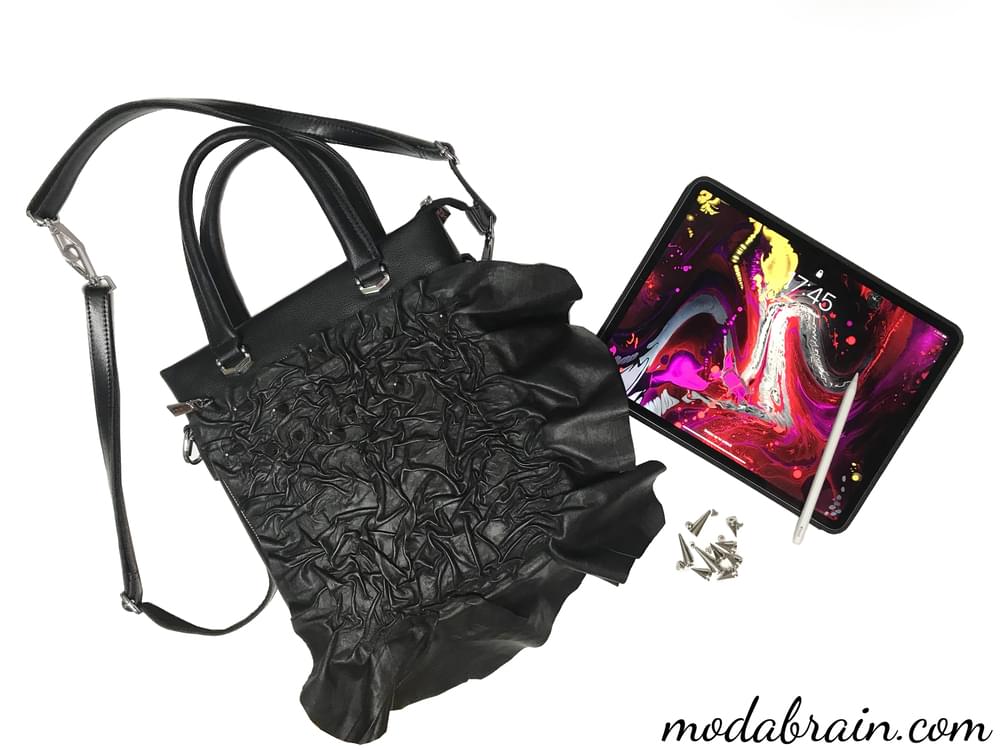
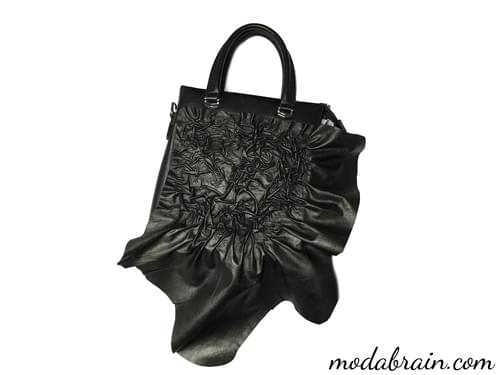
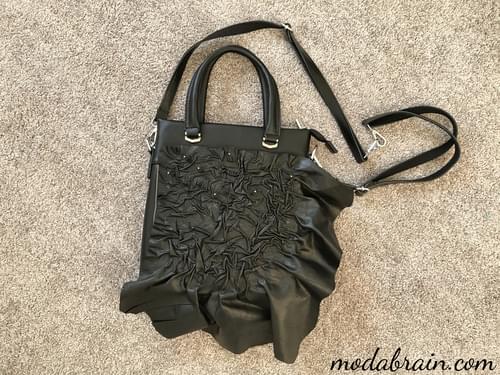
Today we will talk about the bag “Black Rock”. I have already shown you how you can turn an ordinary handbag into an unusual one. You can read about it HERE. This article will be a master class on remaking another handbag that I made especially for my daughter, or rather, for her iPad Pro 2018 (12.9 inches). I couldn’t find anything suitable in the store: if the bag was beautiful, then the size didn’t fit, the iPad Pro didn’t fit in it, and vice versa: if the iPad Pro fit, I didn’t like the bag. I wanted something that others didn’t have. I wanted a small handbag for the iPad Pro, stylish and creative, and a pocket for the Apple Pencil. I had to do it myself.
Content
- Required materials
- Decorating the bag with leather
- Installation of spikes
- Pocket for Apple Pencil
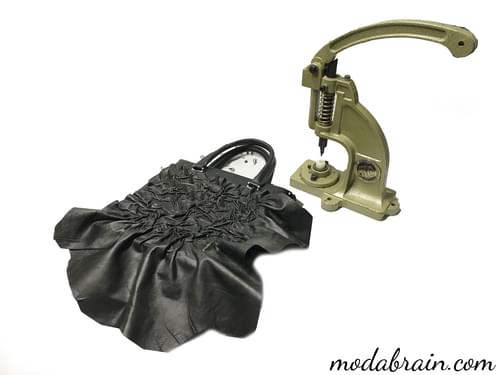
Necessary materials
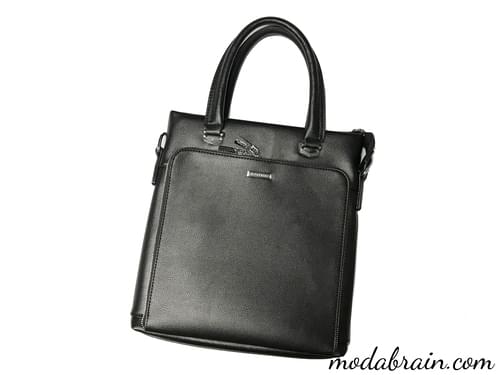
- Bag
- Lambskin of fine dressing
- Clay Moment “Crystal” (bought in the store “Leonardo”)
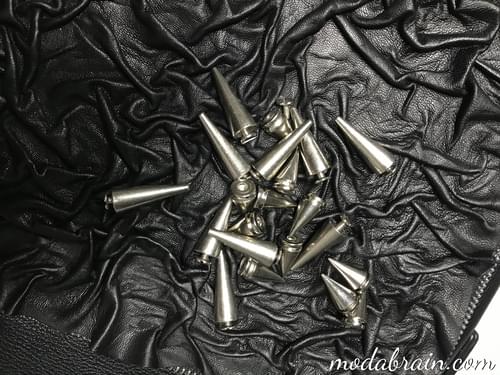
- Nickel-colored spikes, two sizes 2 cm and 2.8 cm (bought at the Rock Bunker store)
Decorating the bag with leather
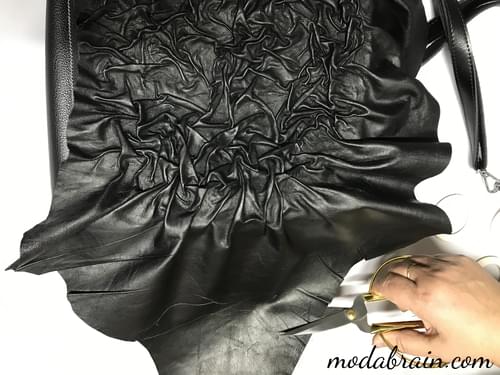
When I start decorating a bag, I only know roughly what I will do, but what happens in the end is always a surprise for me too. All ideas come to me in the process of work. First, I take the bag in my hands, examine it from all sides, evaluate all its beautiful places that I would not like to cover and mark the parts of the bag that I don’t like for some reason and that could somehow be covered with leather. The main thing is that the new decorative parts that we will glue do not prevent the zippers from opening and do not cover the rings on which the bag handles are attached.
Then I pick up genuine leather and also evaluate the skin for any irregularities or holes that may be on natural skin and which need to be masked or cut off. At first, I sort of rehearse with this piece of leather, applying it with one side to the bag, then with the other, in order to understand which edge will lie better on the surface.
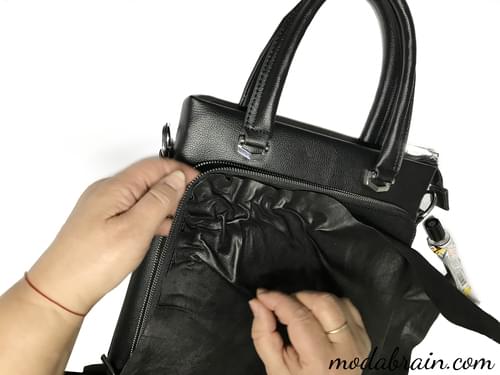
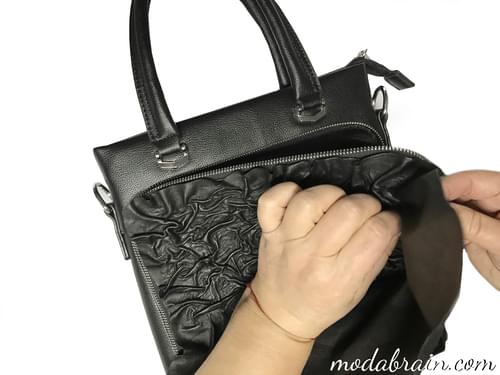
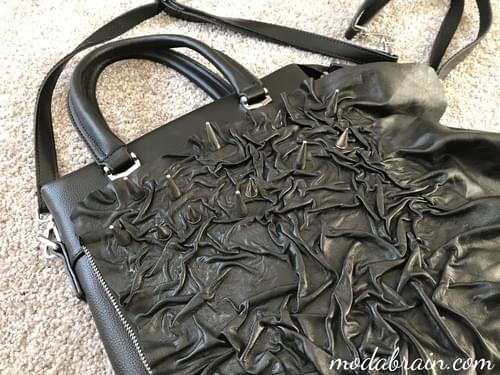
At the top of my bag there is an additional pocket with a zipper, and I decided to cover this place so that only the metal part of the zipper was visible, and the textile strip was covered with leather. But here it is important not to damage the zipper itself with glue, so I did not smear the edge of the skin with glue, but receded by about 8 mm. And so I got a small frill of leather.
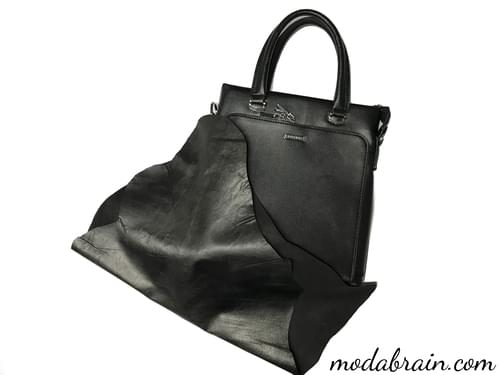
I conditionally called this bag “Black Rock”, so as not to get confused in a large number of bags decorated by me. Before gluing the skin, I recommend that you immediately select two edges of the skin that are even and stick them up and to the left, and leave those sides of the skin that have an uneven edge down and to the right side. Consider which shoulder you will carry the bag on. My daughter, for example, wears handbags only on her left shoulder, and since I made the bag for her, the skin is glued so that it is blown by the wind and the frill is hanging down and directed, as it were, back, it seems that the frill is fluttering in the wind.
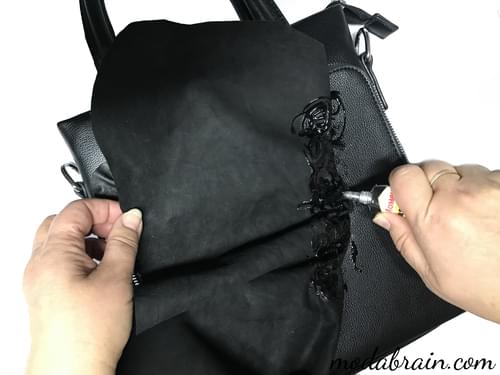
When you have already decided which edge to glue - do not rush to smear with glue. First, open a window so that the room is well ventilated and you are not poisoned by glue fumes. And now let’s get started. Attach the edge of the leather to the bag and knead it a little with your hands so that your fingers feel the texture and get used to the process a little. If you have long nails, they will interfere with you and can damage the skin, scratch it.
You will work with your fingertips, it is with them that you will form the texture. Have you tried? Now let’s move on to the most important thing - gluing. Do not hurry.

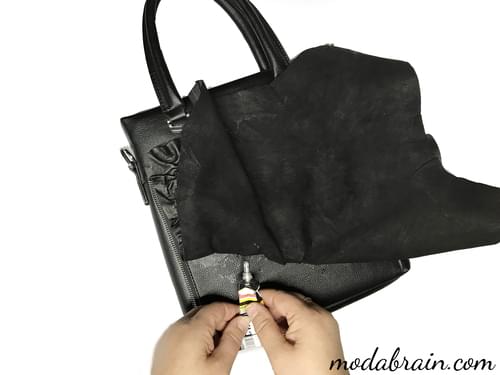
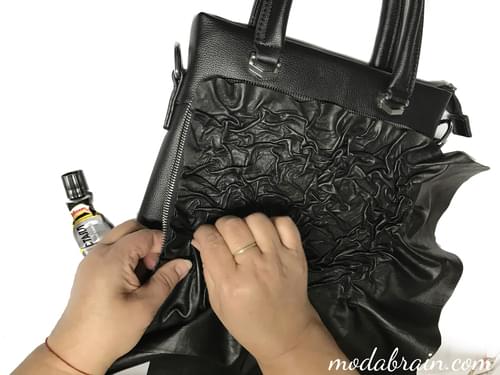
We start gluing the skin from the upper left corner and then move to the right and down about 12 - 15 cm. Do not forget to step back from the edge of the skin 8 mm (this will be a non-glued frill), and glue the wrong side of the skin well with glue. It’s the skins, not the bags. It is important. We will get a small area smeared with glue in the form of a right triangle. And now quickly begin to form a shriveled texture. The skin is softened and easy to wrinkle. Just don’t overdo the glue. Spread well, but not fanatically, so that the glue does not leak over the edges. It takes a couple of minutes to form these small creases with the fingertips until the skin adheres well to the bag. You need to constantly work with the pads of your fingers, pressing down on these creases of the skin.
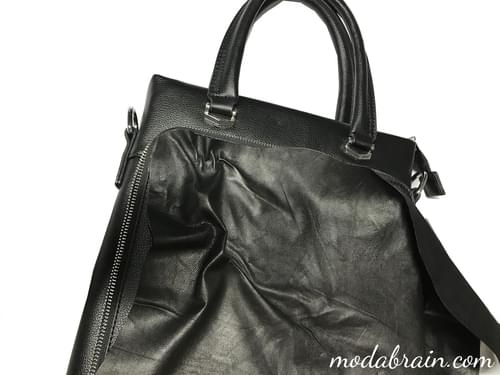
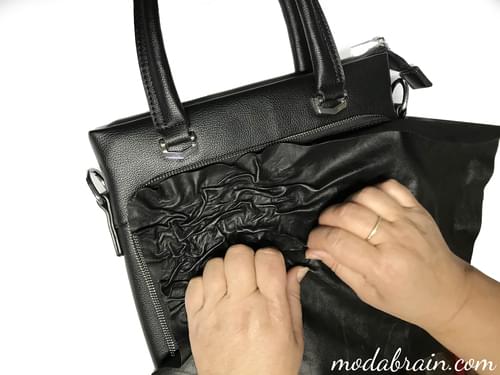
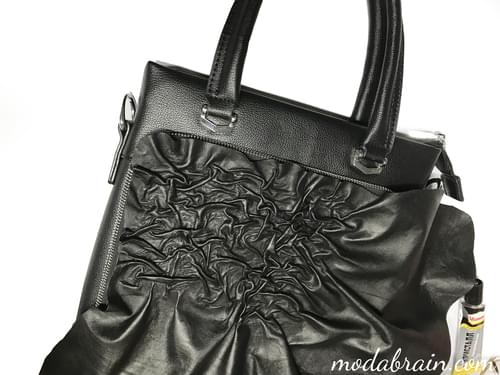
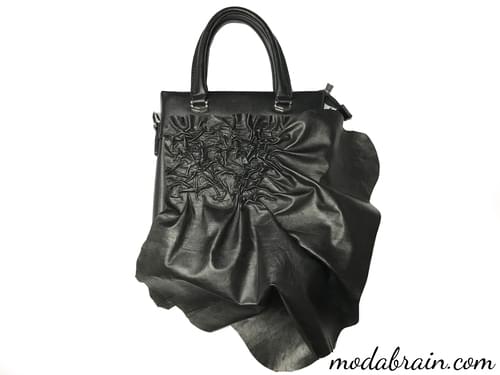
When the upper left part is glued, you can spread the glue further. But do not rush to glue the whole piece with glue! You will not have time to form beautiful creases, as the skin will stick to the bag. Therefore, glue in small pieces. Then we glue the upper right corner, leaving the edges of the skin without glue, forming a frill at the top of 8 mm. We carefully form the texture. Then we glue the right side and the lower part, where we leave a large frill of leather unglued, about 8 - 10 - 12 cm.
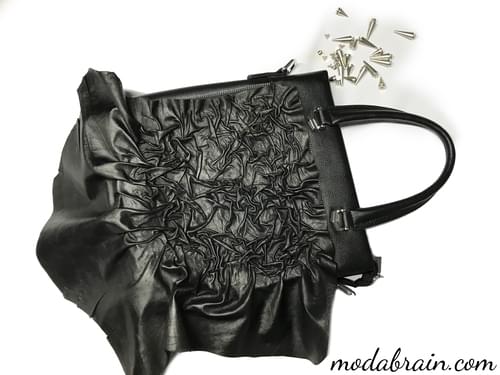
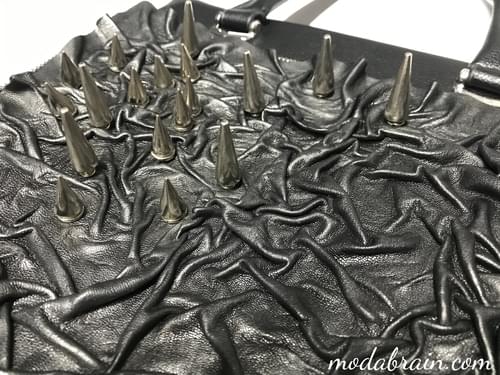
Installation of spikes
After I glued the skin, it seemed to me that something was missing. Therefore, it was decided to install metal spikes in two sizes: 2 cm and 2.8 cm.
With chalk, I marked the places where I first punched holes with a press and then screwed the spikes into them.
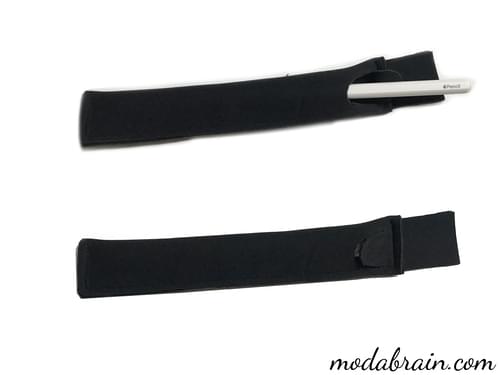
Pocket for Apple Pencil
I cut the neoprene 7 cm wide and 20 cm long, then made an oval cut (the entrance for the Apple Pencil), and then folded this rectangle in half and stitched the sections. After I sewed a small rectangle to it, which I sewed by hand in the inside of the purse.
Voila! My stylish handbag for my daughter is ready! Now her iPad Pro has a beautiful bag! If you want, you will have such a bag too! This does not require a lot of money and a lot of time. All you need is a desire! You will succeed! Dare! And if I explained something incomprehensibly or you have any questions, then feel free to ask me right here below under the article and I will kindly answer you all!
Thank you for reading my blog! I hope you find it interesting. Feedback is very important to me. Write what else to tell you? What else to teach? What would you like to know and what would you like to learn? ![]()