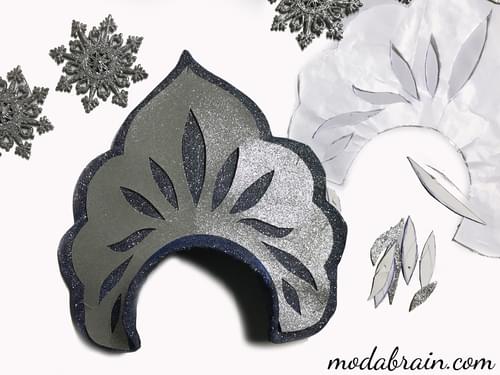
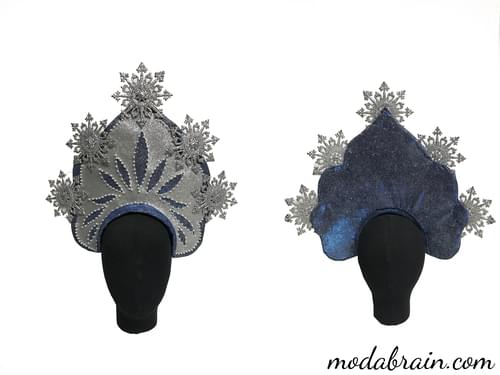
The New Year holidays are approaching and we all think about our outfits for the New Year or outfits for our child for a children’s party in the garden or at school. And now the dress has already been bought or sewn, but where can I find a beautiful headdress? In this article, I will tell and show you how to make a chic New Year’s-style kokoshnik for the Snow Maiden in stages, which is suitable for both an artist of a chic show and a child at a children’s party. This kokoshnik will look great even with an evening dress.
Content
- Required materials
- Sketch
- Creating the base of the kokoshnik
- Covering the base of the kokoshnik with a shiny fabric
- Decorating the kokoshnik
Necessary materials
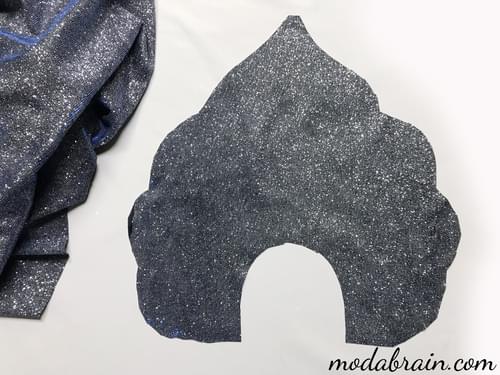
- Felt 0.5 cm thick (bought at the Leonardo store)
- Wire (bought at the Leonardo store)
- Clay Moment “Classic” 125 ml
- Glue “UHU”
- Glue “Fevicryl”
- Reinforced threads
- Knitwear shiny
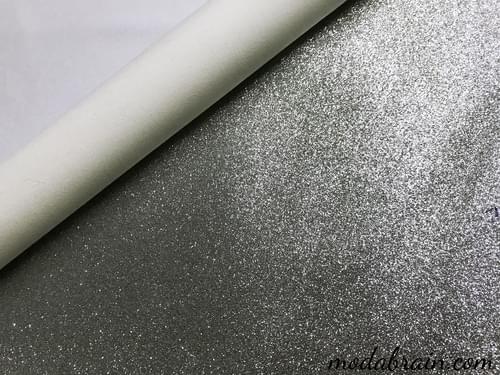
- Decorative fabric with silver sequins (bought at the Isadora store)
- Christmas decorations for the Christmas tree: snowflakes - 5 pcs (bought in the “Billa” store)
- Christmas decorations for the Christmas tree: a pendant with snowflakes - 2 pcs (bought in the “Billa” store)
- Christmas decorations in the form of icicles - 4 pcs (bought in the “Billa” store)
- Rhinestones “Crystal” size 20ss
- Rhinestones “Drop” of blue color - 6 pcs
- Pearl white small
- Large white pearls - 7 pcs
- Silver pearl
- Semi-pearl - 10 pcs
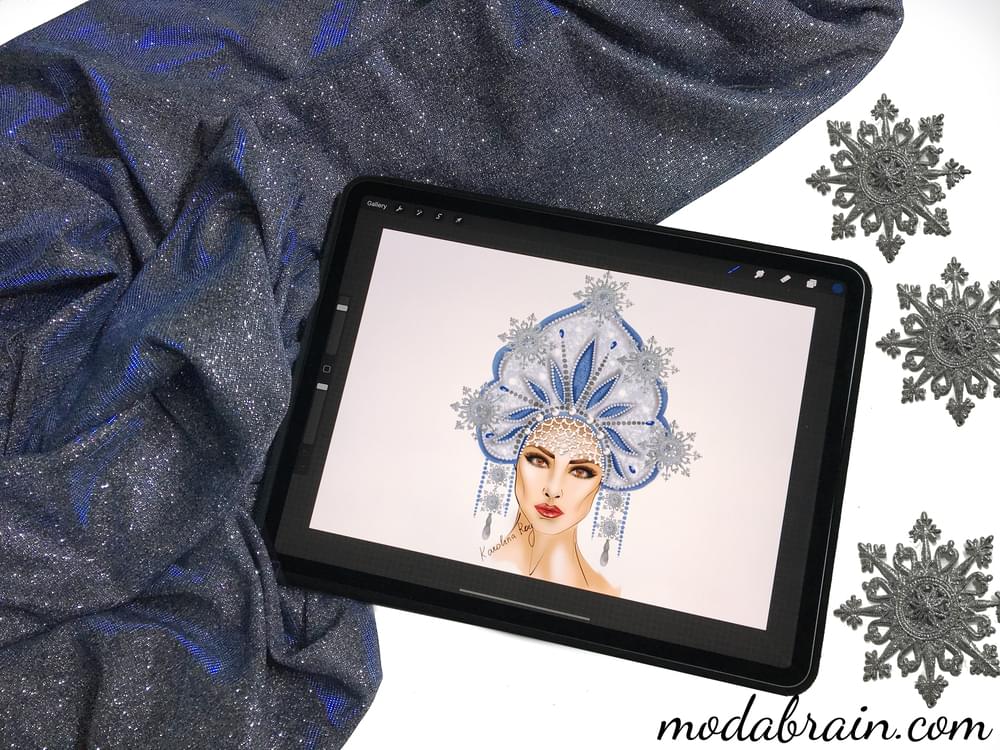
Sketch
As always, I started the work with a sketch that I drew on the iPad Pro 2018 in the Procreate program.


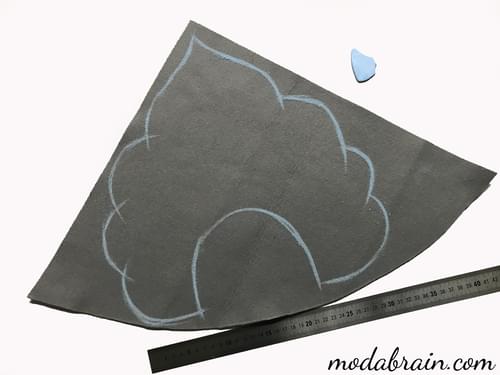
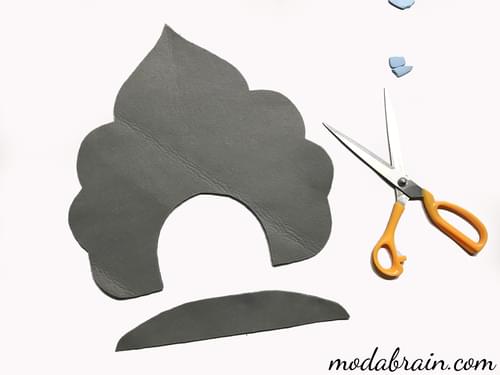
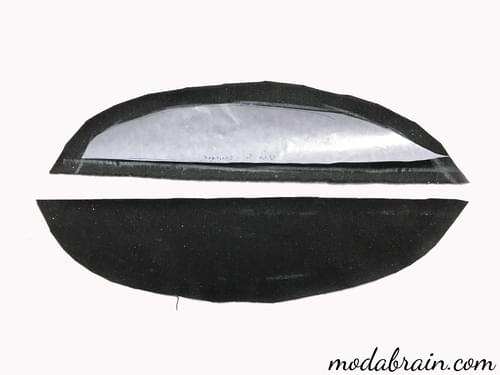
Creating the basis for the kokoshnik
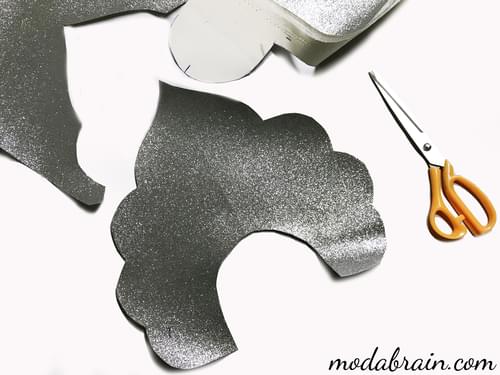
I cut out the base of the kokoshnik and the rim from felt.
I connect the base of the kokoshnik and the rim with pins, and then sew them together.
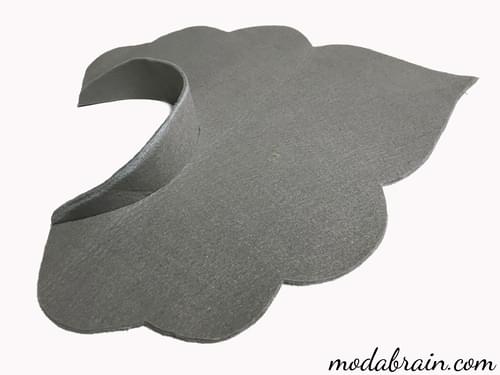
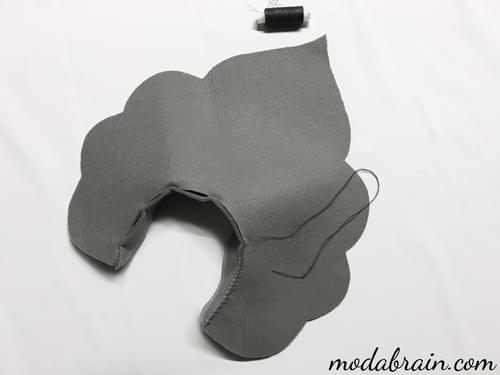

Then I take the wire and lay it out along the base and throughout the field, pin it to the base with pins, then sew the wire tightly to the base.
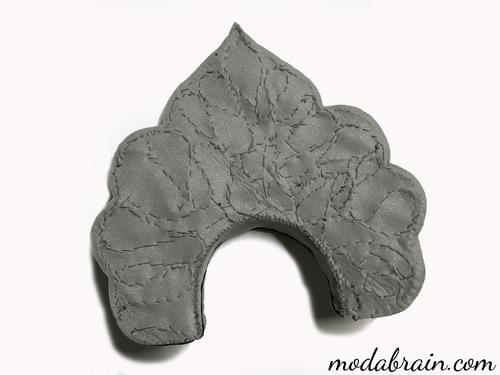
After I sewed the wire to the base, I cover the entire surface of the kokoshnik with instant glue. Glue gives strength to the base. And I let it dry for 24 hours.

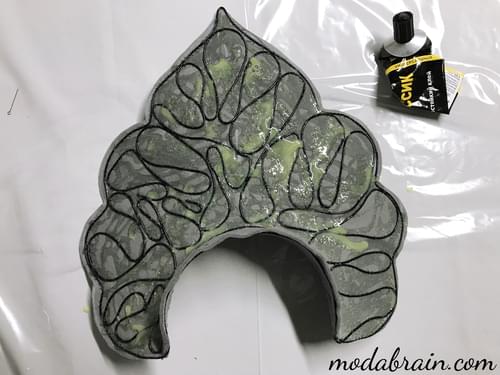
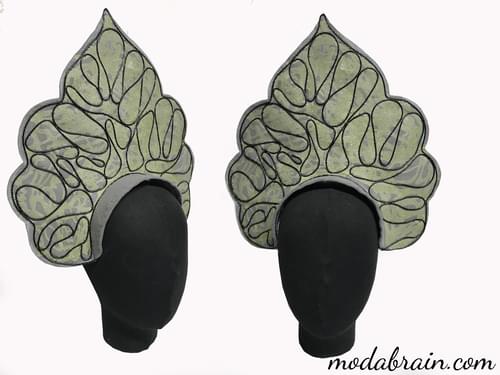
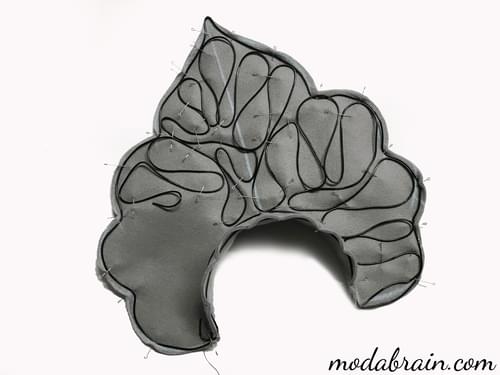
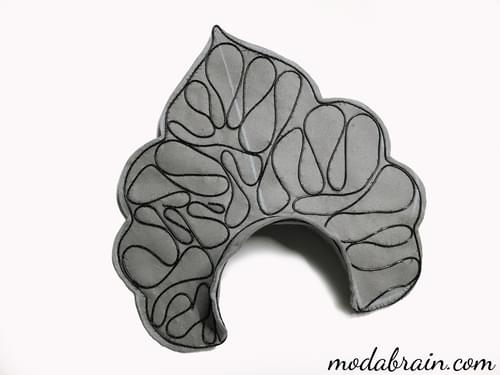
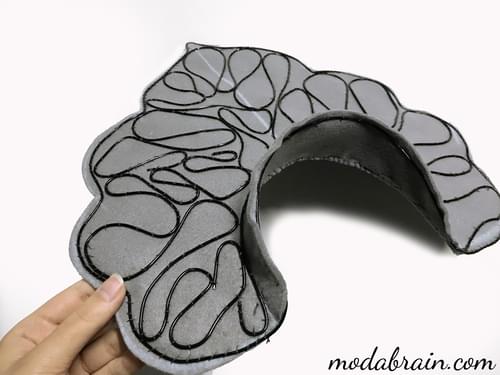
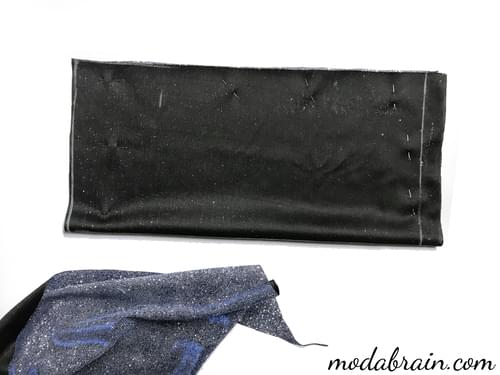
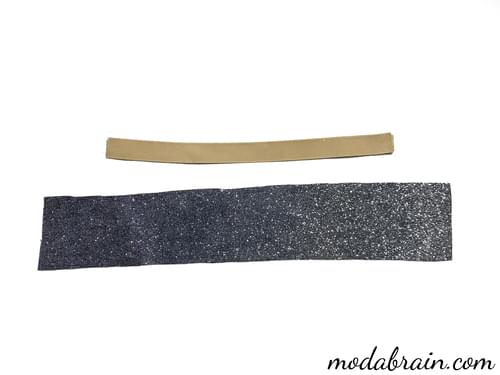
Covering the base of the kokoshnik with a shiny fabric
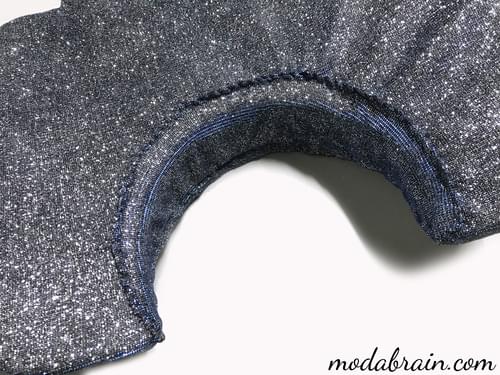
Then I cut out two parts of the base of the kokoshnik and two parts of the rim from the sparkling material and grind them together. It turned out such a kind of cover, with which I will fit the base of the kokoshnik.
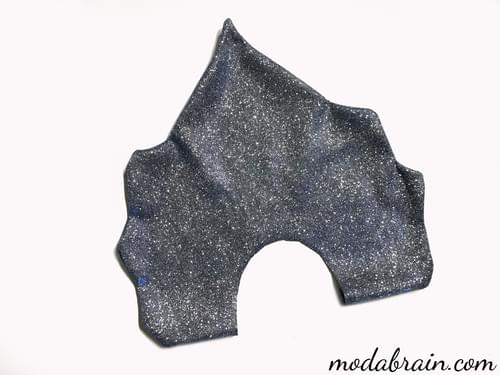
I put a cover on the base of the kokoshnik, then sewed up the open edge on the back of the kokoshnik with hand stitches, and also fastened the rim with stitches.
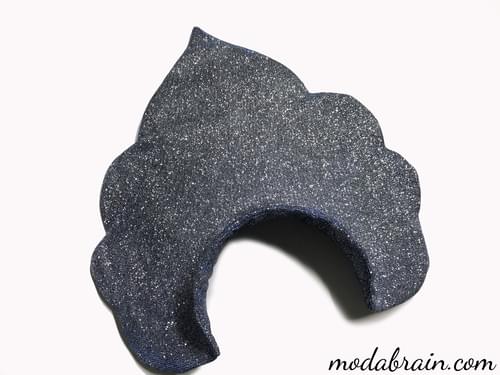
Decorating the kokoshnik
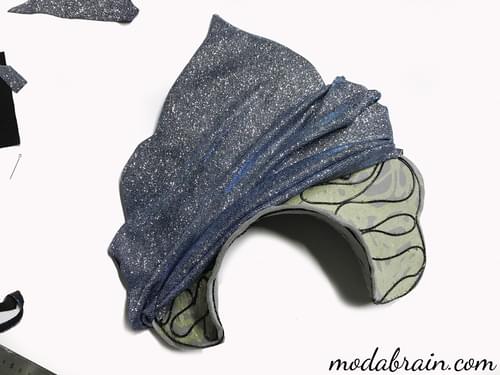
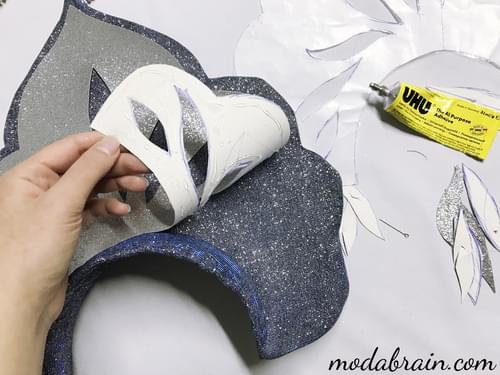
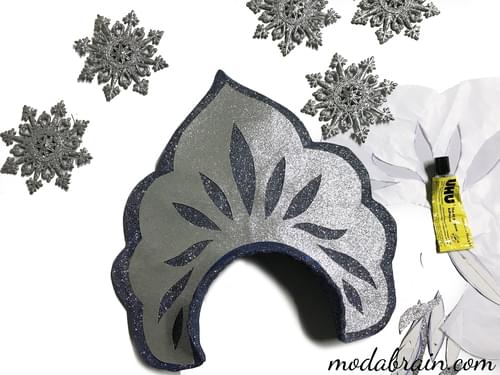
I cut out one detail from the “silver crumb” material according to the patterns of the base of the kokoshnik, then reduced it a little along the upper contour by about 2 cm and cut out patterns in the form of petals so that the lower sparkling fabric could be seen through.
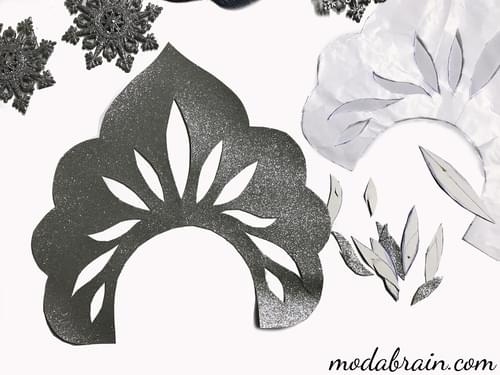
After I glued it to the kokoshnik with “UHU” glue, and then secured it with hand stitches with pearls.
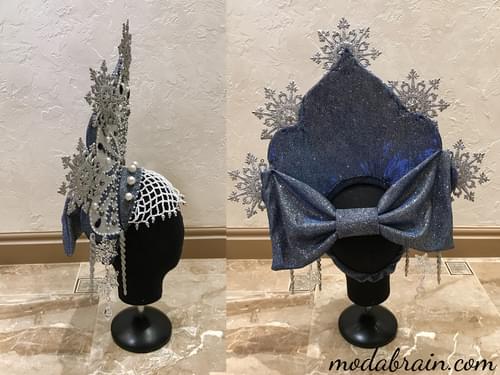
Then I sewed 5 large snowflakes 12 x 12 cm in size to the kokoshnik.
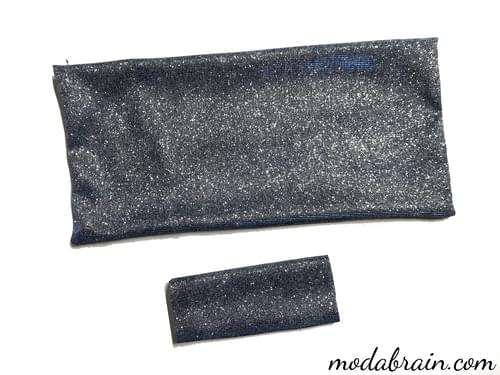
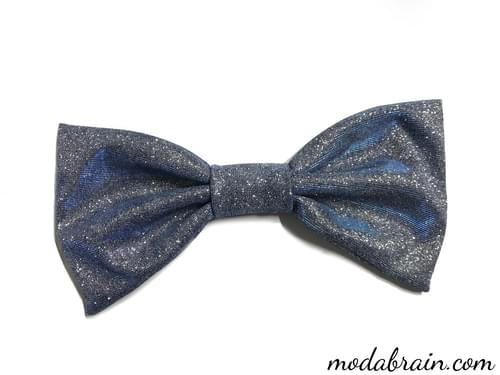
Before gluing the rhinestones, I decided to prepare a bow, which I will sew at the very end to the kokoshnik. I cut out a square 40 x 40 cm from the fabric with which the kokoshnik was covered, folded it in half and stitched it on a sewing machine, leaving a small hole through which I would turn the bow on the front side. Then, with a 7 cm wide rectangle, I fixed the bow in the middle in the finished form.
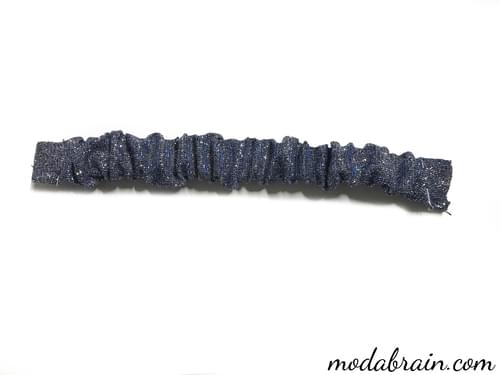
After that, I prepared an elastic band, which I also covered with the main fabric and sewed it to the kokoshnik. This elastic will better fix the kokoshnik on the head.
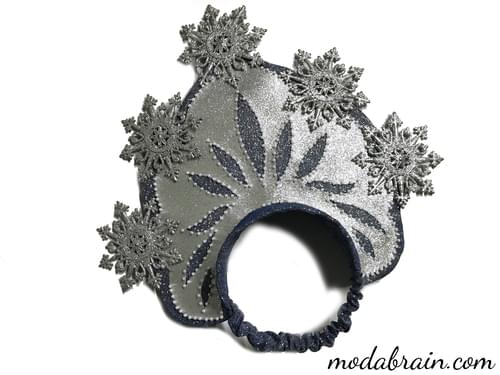
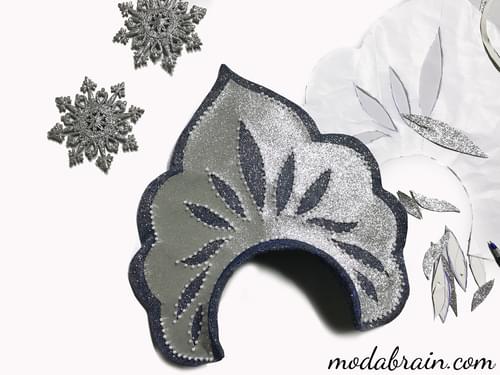
Then I continued to decorate the kokoshnik. With “Fevicryl” glue, I glued small rhinestones in the form of blue drops, and also glued white and silver pearls, semi-pearls and “Crystal” rhinestones in size 20ss.
After that, I began to make a piece of pearls on the rim of the kokoshnik, and also sewed large pearls on the rim (you need to sew in 4 threads).
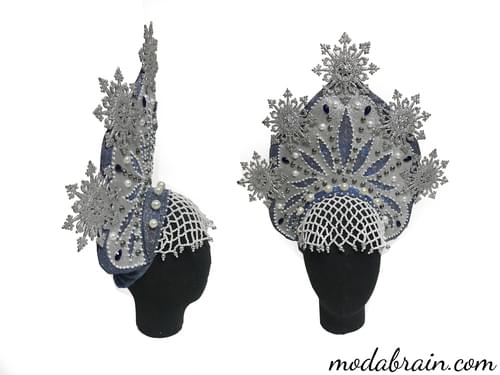
Now it remains only to sew Christmas tree pendants in the form of snowflakes and ice icicles to the kokoshnik, as well as a decorative bow on the back of the kokoshnik and my kokoshnik is ready.

I would really like to write that all this is done easily and quickly and that you can make such a kokoshnik in one evening, but unfortunately get ready to spend at least a couple of days 🙂. It took me 4 days to create this kokoshnik, despite the fact that I did not make such a base for the first time, but only the decor was different, but everything beautiful takes a lot of time.
Thank you for reading my article. I hope she will help you create your own kokoshnik, in which your Snow Maiden will be the most beautiful on the holiday. This New Year’s kokoshnik looks very beautiful and will suit the Snow Maiden of any age and for any outfit. It will look great with both a fur coat and a dress. In such a headdress you can make a beautiful photo shoot.
If you have any questions in the process of work, write them below in the comments and I will kindly answer them ![]()