I have been asked for a long time to tell how I make voluminous flowers. This article will be about it. There are many options for creating volumetric colors and there are also many techniques. I will tell and show you two options that even a beginner can do. These flowers will be from supplex and wire. They are light, beautiful and hold their shape well. This way of creating flowers is very well suited for hats.
Content
- Required materials
- Lekala
- Process
Necessary materials
- Biflex
- Felt (a small piece of black)
- Glue web
- Wire
- Acrylic paint for black fabric (Decola)
- Paint brush
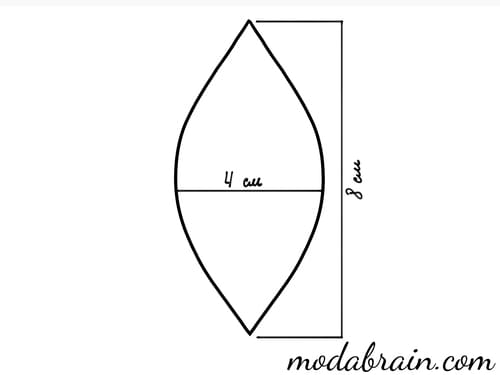
Lekala
First, draw the shape of a petal on paper. This will be the template.
Process
Now take a small piece of supplex, approximately 20 x 30 cm in size, fold it in half, and put a sheet of glue cobwebs around the entire perimeter in the middle. Then carefully align the edges of the supplex and the glue cobweb, it is better to cut off the excess cobweb immediately so that it does not stick to the iron later. Next, carefully iron this “sandwich” so that the glue cobweb glues these 2 layers of supplex together. You have a dense material that resembles neoprene.
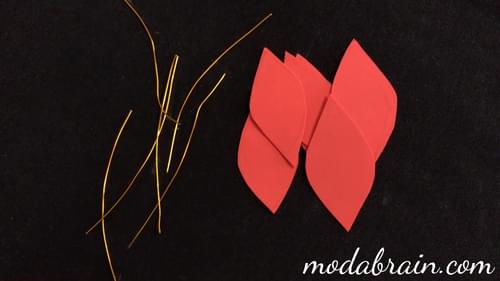
Now cut out 6 petals from this “newly made” material, applying a petal pattern. “Why did I make these lilies from supplex,” you ask. Because it does not crumble and after gluing with a glue cobweb it will be dense, but pleasant to the touch. If this is done, for example, with satin, then the petals will be very dry and the flowers will look like dried flowers.
Cut out 6 petals from orange supplex - “sandwich” or from any other color that you have.
If you don’t have one solid piece of supplex, but only trimmings, then you can cut out the petals from them by applying a petal-pattern and also cut the petal from the glue web and insert it between two petals from the supplex. Only you should already have 12 petals, and after gluing there will be 6. But I don’t recommend you make petals this way. I know from my own experience that they are more accurate if they are cut from a finished glued “sandwich”.
Now take the wire and we will attach it to the petals. The length of the wire depends on where you will be using these flowers. In hats, I leave the end of the wire long. In these flowers, I also left long ends for convenience, so that it is easy to hold in your hands during painting and you can dry them by sticking them into something soft, for example, into a foam rubber washcloth. If you are limited in materials, then you can leave the tail of the wire very small.
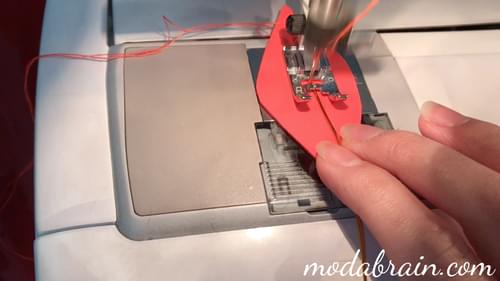
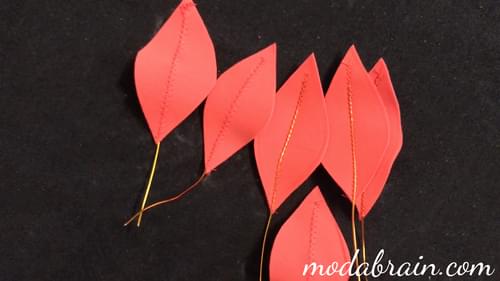
Option 1
Here the wire goes around the contour of the petals. Leaving a wire tail at the edge of the petal, we go around the contour of the petal and attach it on a sewing machine with a zigzag seam. At the end, we also leave a tail of wire.
Option 2
Here the wire runs along the middle of the petal. We also leave the tail and attach the wire with a zigzag seam.
Of course, the best option is when the wire is inside between the layers of the supplex, that is, when we glue the supplex together with a glue cobweb, we immediately insert the wire there. But then, in any case, it will be necessary to sew a “zigzag” seam on top so that the wire inside does not “ride”. This will require some skill as the wire is not visible and you will have to feel it while stitching and you may break the needle this way.
I also recommend stitching the edges of the petals with a zigzag seam. The supplex does not crumble, but the edges can delaminate. If you need a flower to use it a couple of times - you can not process the edges, and if long-term operation is expected - then it is better to process the edges with a “zigzag” so that the flower has a presentable appearance for a very long time and does not delaminate.
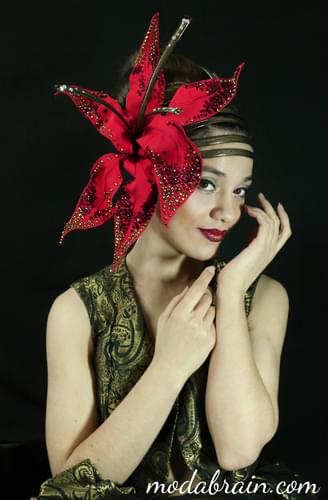
At the end of the article, I will show you an option where there is a wire inside the supplex in the headdress.
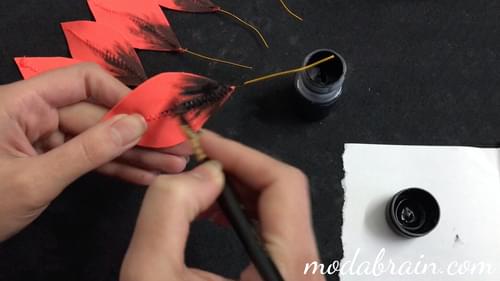
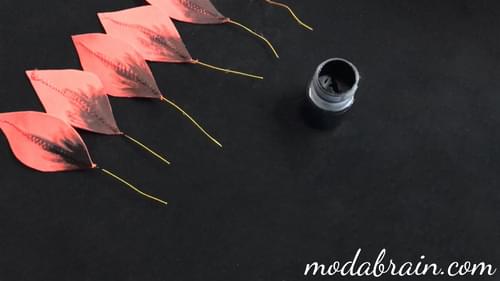
The next step is painting the petals. There is nothing complicated here either. We take black acrylic paint and holding the tip, paint the bottom of the petals. Let’s give them time to dry.
Next, cut out of felt for each petal 2 circles, approximately 1.5 - 2 cm in size.
After that, carefully sew the petals on a circle of felt. With the second circle of felt, close the middle of the petal. The basic base of the flower is ready!
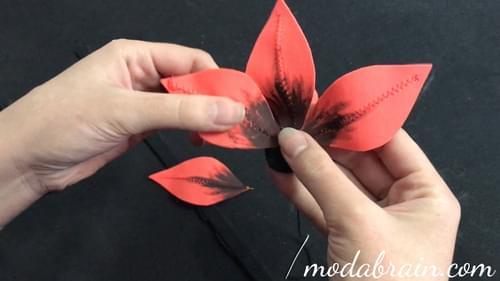
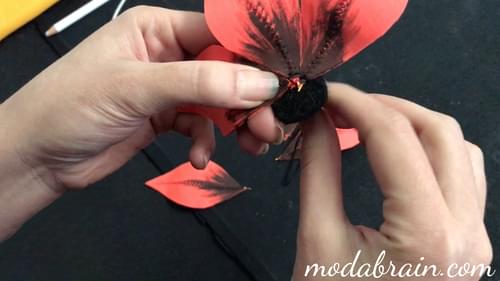
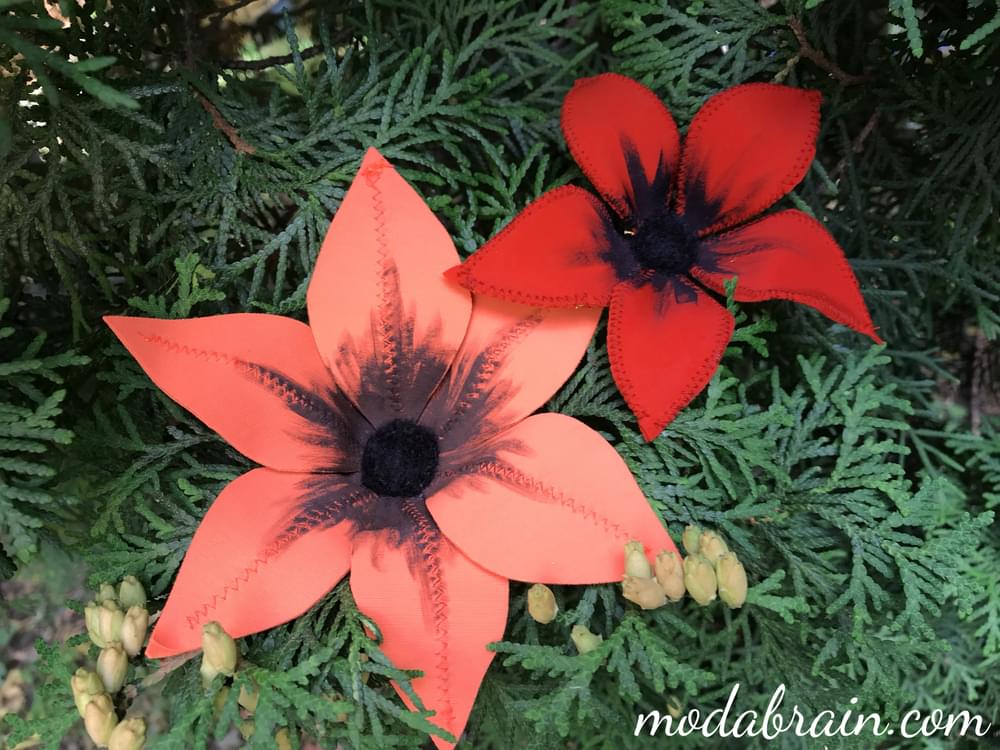
Our flowers are ready.

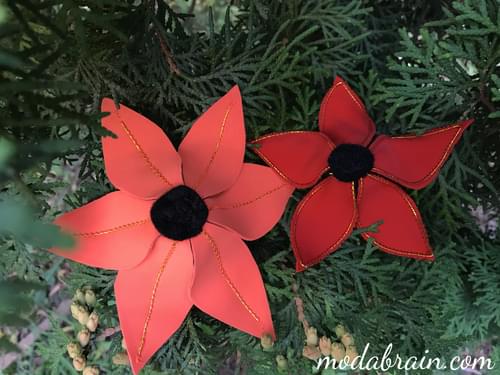
Now you can decorate these lilies according to your desire and taste, so that they are even more beautiful and have a complete look. Give free rein to your imagination. Take out the beads, rhinestones, beads you have from the jars and bubbles and decorate them. The decor depends on where you will use these flowers. They can be worn as a separate brooch, attached to a pin; you can decorate the rim with them, you can sew lilies to the curtain holder, you can decorate with such lilies a floor lamp or lampshade, a night light in the bedroom or in the children’s room.
The middle of the lily can be decorated with beads of different sizes and colors, or you can make a bunch of stamens from a large glass bead. If your lily is white, it can be decorated with pearls and “Crystal” or AB rhinestones (Aurora Boreal are those that shimmer with all the colors of the rainbow). The edges of the petals can be decorated with glue rhinestones. Sizes of rhinestones 20ss or 16ss are best suited.
For a lily headdress, you can make a much larger size, where the length of the petals will be 20 - 25 cm. And you can sew them on the finished headband.
As you can see, there is nothing complicated here. Even a schoolgirl can handle it. If something was not clear to you in my article - ask here in the comments under the article. I will kindly answer all your questions.
Thank you for reading my article, I hope it will help you when creating your masterpieces ![]()