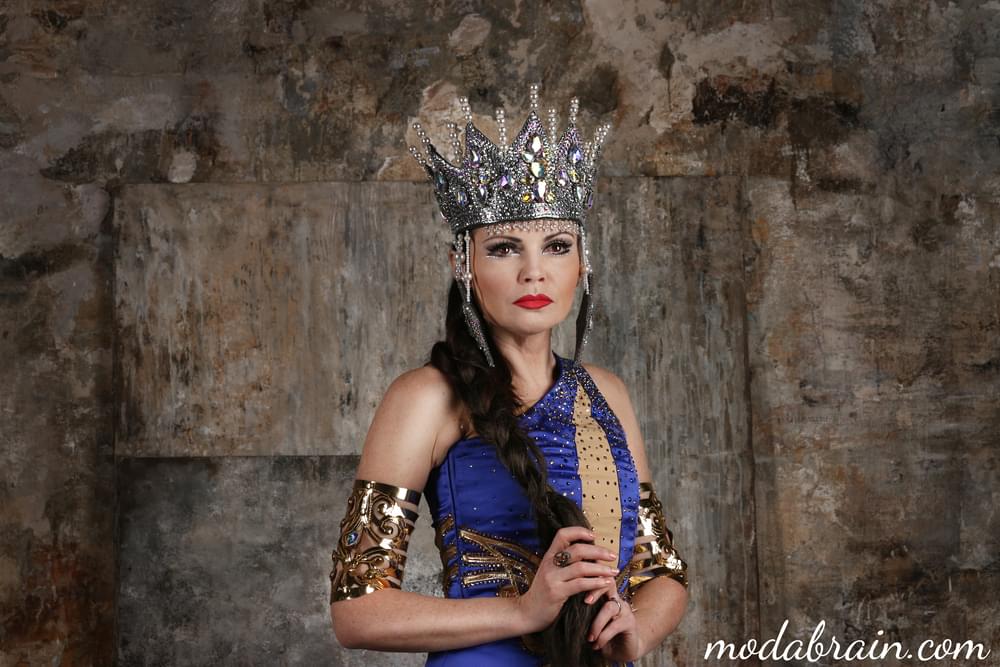
In this publication, I will share with you, dear readers, my design secrets and developments for creating a fabulous crown. I will tell you what materials it is better to make the base - the frame from, so that it is light and comfortable, and I will show you how and with what to decorate it so that it sparkles amazingly. This crown is very richly studded with stones: large and small. It has about 35 large sew-on rhinestones in pins and over 1500 glued rhinestones in sizes 20ss and 16ss hot fix.
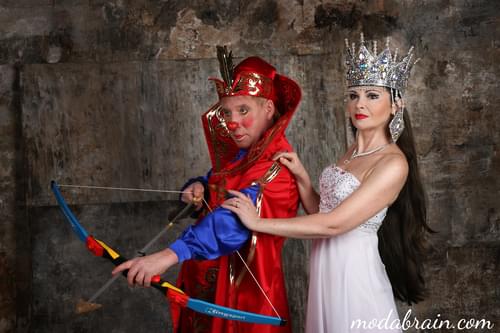
Very beautiful! - you say, - but where to wear it? I made this crown to order for the circus performer who plays the role of Vasilisa the Wise in the number of illusory transformation based on the Russian folk tale “The Frog Princess”.
You can wear this luxurious headpiece to a costume party, a bachelorette party, a photo shoot, your birthday, your daughter’s matinee, New Year’s Eve at school, and even your own wedding! This crown will look great with a wedding dress and veil. You can adapt it to a modern wedding dress: under a dress in the style of “princess”, under a white trouser suit, or you can also under a royal wedding dress in the style of Russian folk tales. If such a crown is made for a wedding dress, then it must be made of the same materials as the dress. And you can make it for yourself to always feel like a queen!
Content
- Drawing a sketch
- Taking measurements
- Preparation of the base - frame
- Decorating with rhinestones
Necessary materials
- Felt 0.5 cm thick (can be bought at the Leonardo or Igolochka store)
- Aluminum wire thin and thick (can be bought at the Leonardo store or Igolochka)
- Silver jersey with the effect of liquid silver (can be bought at the Isadora store)
- Large sew-on AB round and oval rhinestones in caps - 35 pieces
- Rhinestones AB hot fix size 20ss and 16ss - 1500 pieces
- Thermoapplicator
- Glue “Moment Crystal”
- Reinforced threads N 35
- Beads “Rhinestone” 2 sizes
- Pearls in 4 sizes
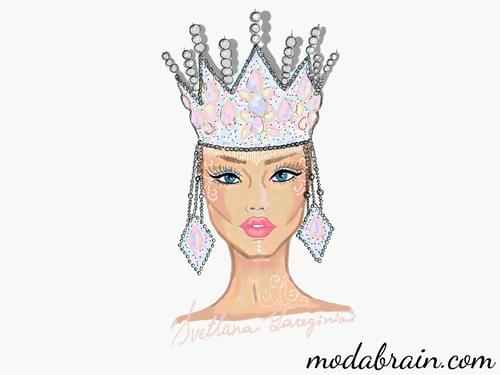
Draw sketch
First of all, first we draw a sketch of the future crown. Here’s how I drew my crown:
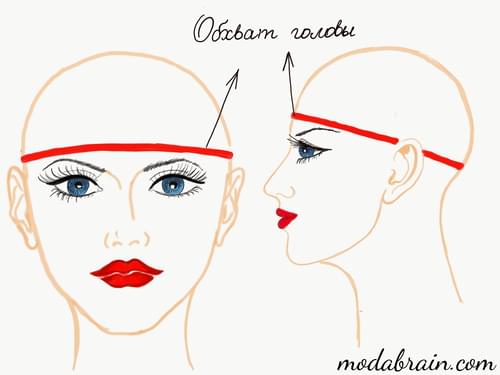
Taking measurements
We take measurements for the crown, taking into account its fit on the head. If you want a small crown that will just stand on top of your head, fixed with invisibility - this is one thing, but if you want it to sit on your head at a certain level, then at the same level you need to measure your head with a centimeter tape.
I made a crown for an artist who has to quickly put the crown on herself right in the arena in front of the audience during the performance, and then dance in it and move quickly, so I made it with a deep fit on her head. In order to fix the crown with invisibility on her head right on the arena, the artist had neither the opportunity nor the time (and this cannot be done in front of the audience).
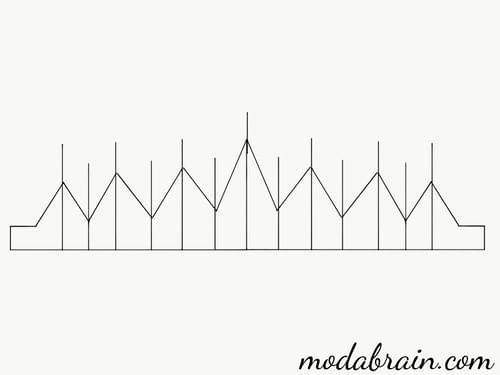
Preparing the base frame
Next, we take a sheet of felt and, according to the technical sketch, we make a pattern of the crown on graph paper or just on improvised paper. Set aside a straight line equal to the girth of the head. We designate the middle of the crown. We draw up a segment equal to the desired height of the crown. We divide into 7 parts. We draw the teeth of the crown, which decrease slightly towards the edge and they should be symmetrical at both ends. On both edges of the teeth, we leave small reserves of 0.5 cm for hem.
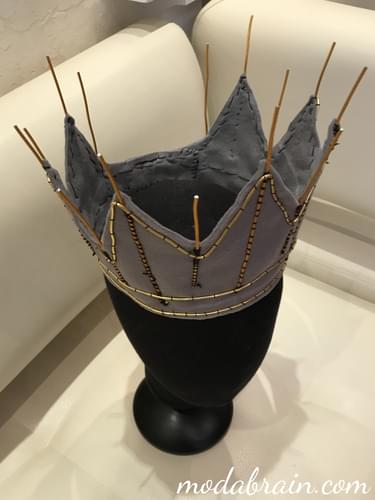
We cut out the felt, but do not rush to sew it into a ring. We still need to strengthen the base of the crown and the teeth with wire. To do this, we circle the wire at the bottom of the base and along the entire contour with teeth. In order for the teeth of the crown to stand firmly and not deform, it is necessary to strengthen the teeth. To do this, we draw beams in the center of the teeth with a wire, fastening the entire frame with a thin wire. We leave beams of wire sticking out in the center of each tooth and between them.
Further, the entire base must be treated with Moment Crystal glue, smearing the entire surface with glue - leave for a day until completely dry.
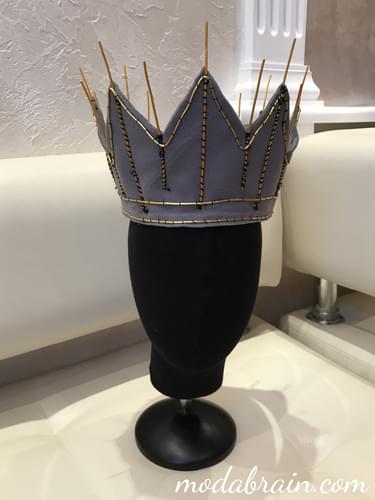
After that, I covered the base - frame with silver jersey with the effect of wet silver. To do this, we need a needle and reinforced threads, I sewed in 2 additions to make the crown stronger. We connect the crown in a circle. Behind left specially strip without teeth at the request of the artist.
Decoration with rhinestones
Then comes the most interesting part in the process of making this royal headdress - decorating with rhinestones! Here you can decorate the crown to your taste and depending on the availability of rhinestones. My crown should look expensive - rich, because this is a fairy tale and this crown is for Vasilisa the Wise herself, so it should all be strewn with stones and sparkle.
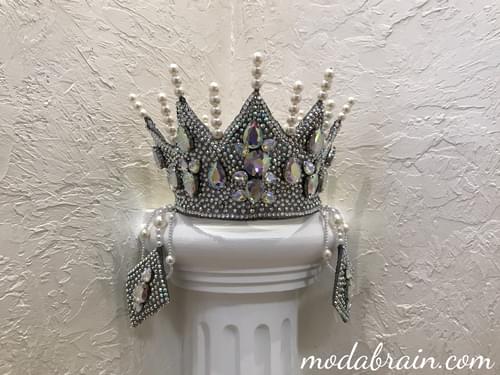
Start by sewing on the largest rhinestones, placing them at the top and center of the crown, and then at the center of each prong. The space between the sewn-on stones is filled with hot fix AB rhinestones, size 20ss. For gluing rhinestones, we use a thermal applicator. If you have cold-fixed rhinestones, you can glue them with B-6000 or B-7000 glue, or Fevicryl Indian white glue for rhinestones. Do not confuse with PVA glue! Once I mixed up the bubbles with glue and glued them on PVA - I had to redo everything later. Therefore, be careful and careful. Why do I most often glue with hot fix glue - because it clings instantly, and gluing rhinestones with a cold method takes much more time and it does not immediately cling, rhinestones can “go” if you touch them with your hand or tilt the surface that we decorate.
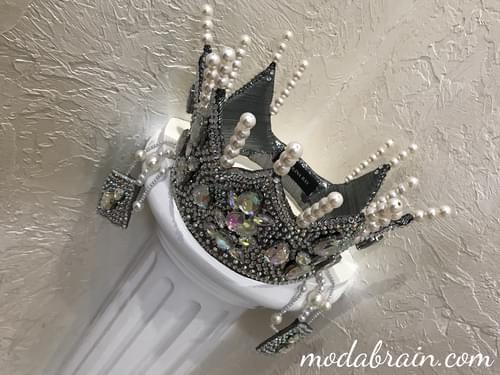
We string pearls on the beams of wire. We put on 3 pearls on the central rays of the teeth of the crown, and on the intermediate rays between the teeth we put on 5 pearls and fix them. To prevent the pearls from flying off, you can bend the ends of the wire with round-nosed pliers. I fixed the pearls on the beams with a glue gun.
The next step is to make improvised hanging earrings. To do this, cut out 2 rhombuses from felt, with a side size of about 6 cm. We cover them with silver knitwear, carefully closing the edges. In the middle, we sew a large AB stone in the form of a drop into 4 threads, and sew medium-sized AB rhinestones in the form of a drop on top and bottom. We glue the entire field with AB rhinestones of size 20ss and 16ss.
Then we attach these earrings to the crown. First try on the crown for yourself or for the customer and determine the place of attachment of the earrings and their length, because the shape of the face is different for everyone and it is better to try it on right away so as not to redo it later. First we attach the middle of the earrings. It is better to attach earrings in 4 threads (reinforced) in order to hold firmly. We fix the thread at the top of the rhombus and string 3 medium pearls, then 1 large and again 3 medium ones, and sew it firmly to the crown. Then we make 2 more pendants on the sides. Here you yourself must determine the number of pearls to hang so that the earring hangs beautifully and does not twist. I have collected 3 small pearls from the earring, 1 medium, 11 small, 1 medium and again 2 small pearls. You may have a different number of beads, it depends on the size of the pearl and on the length at which you decide to make the earrings.
To complete the decor of the crown, you can make a hinge over the forehead. Beads that you have available are suitable for this. I made a hinge of “rock crystal” in two sizes. It shimmers beautifully and gives radiance to the face of the artist. Also determine the length of the hinge yourself, since everyone has a different forehead height. It will be beautiful if the hinge reaches the eyebrows, but does not cover them. I made about 20 pendants: 2 small lenses, 1 large and again 1 small lens - do not cut the thread here, but go back, fixing the pendant on the crown. Be sure to make an inconspicuous knot, only then make a new pendant, which you also start with a knot. This must be done so that if one pendant comes off, others do not start to crumble. We make a hinge in 2 threads.
The crown is ready! As you can see, she looks luxurious! If you make such a crown for a wedding dress, then it is also better to make it in the old style. A piece of the thinnest transparent veil with rounded ends, which covers the bride’s head, can serve as a veil here, and this royal crown is placed on top. The dress here can be made of mother-of-pearl brocade and with pearl trim, use “Crystal” and “rhinestone” rhinestones - they will add luxury and brilliance to the outfit.

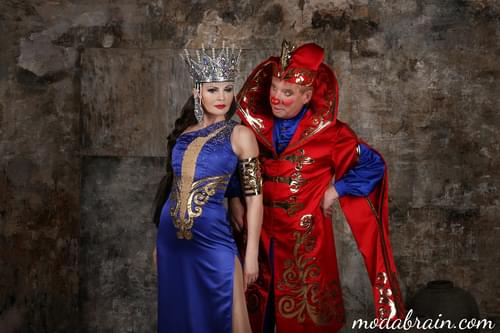
The crown can also be made in a different color, for example: red with gold under a red dress. In this image, you can celebrate your birthday or arrange a photo session for yourself and your girlfriends in a photo studio, where there are beautiful palace interiors or in nature. The effect will exceed all your expectations.
I tried to describe in as much detail as possible the process of creating this royal headdress and I hope that everything worked out for you! If you liked the article - please put likes or dislikes if you didn’t like something.
I would be glad if you write your comments below under the article and tell us if it was easy for you to repeat the same crown? Did you succeed? If you have any questions - ask in the comments, none of your questions will remain without my answer.
What other workshops would you like to offer? What would you like to do with your own hands, but you do not know how to do it, where to buy materials and where to start? Ask and I will teach you how to make and tell you where you can buy everything you need.
Thanks for reading the article! I hope it was interesting and useful for you ![]()