In this article, I will tell you in detail how and in what programs I need to print my patterns of a gymnastic leotard on A4 paper so that the leotard ends up in the correct scale, and also in what order to fold all the sheets and glue them with adhesive tape.
Content
- Patterns of a swimsuit and its size
- Pattern printing
- Pattern printing using Windows
- Print patterns using macOS
- Pattern assembly
- Change patterns
Patterns of a swimsuit and its size
When choosing a size, keep in mind that the jumpsuit was built taking into account the coefficient of stretch of the fabric, to make it easier to understand what it is, they are sometimes called negative increases and decreases. Some horizontal dimensional features were reduced to 15%, and vertical ones to 5%. Such dimensional signs as: chest girth, waist girth, hips girth - decreased by 15%.
In the table, dimensional characteristics are indicated without taking into account negative reductions, so keep in mind that on the printed patterns, the girth of the chest, waist and hips will be 15% less than indicated in the table.

The patterns of the gymnastic leotard are suitable for materials such as: supplex, mesh, knitwear.
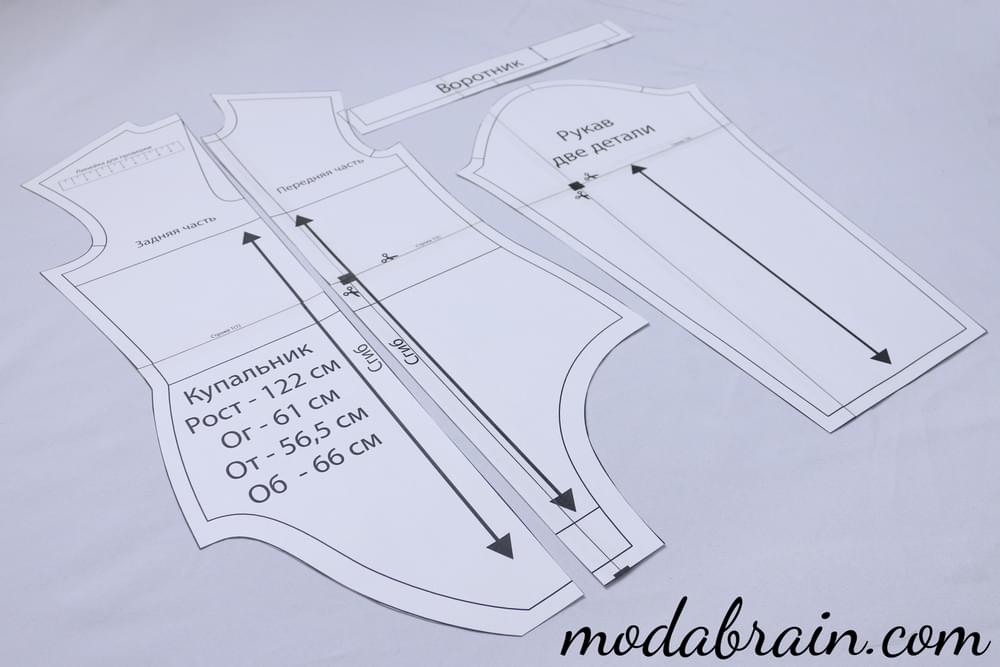
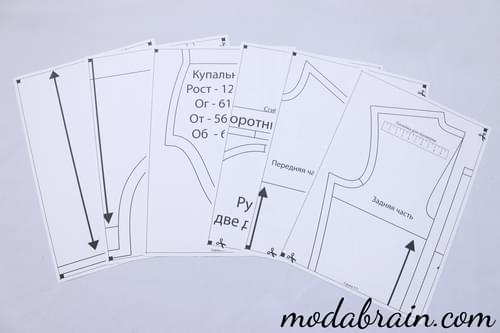
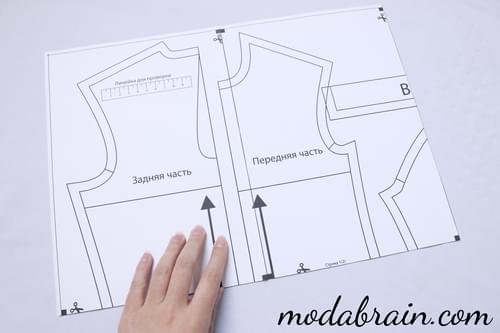
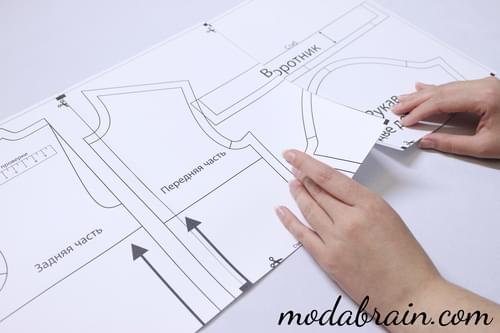
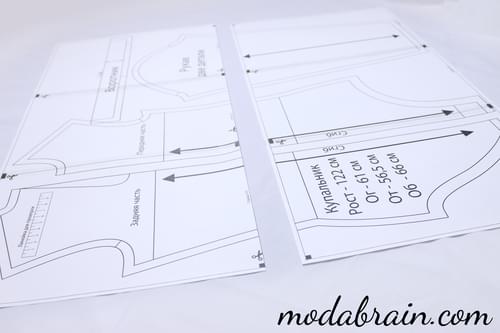
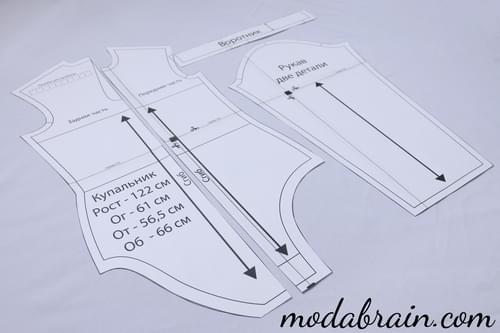
The layout shows the front of the swimsuit and the back of the swimsuit, which, when cutting, need to be laid on the fold of the fabric. Sleeve template - cut out two parts in a mirror. There is also a stand-up collar on the layout, you need to cut it by laying it on the fold of the fabric.
There are reference points on the collar, one point in the middle of the collar that connects to the middle of the neckline. The second reference point on the collar marks the end of the neck length and is located 2 cm from the seam line. These extra 2 cm are needed to fasten the collar, they will then overlap.
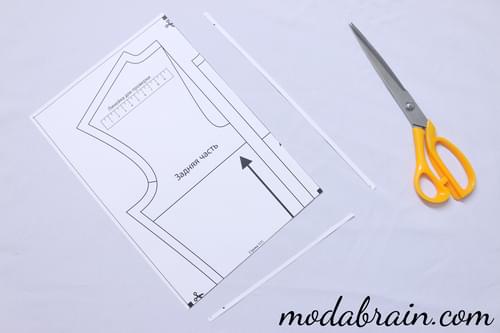
The middle vertical line on the back of the leotard is even, so the template can be placed on the fold of the fabric and the back of the swimsuit can be cut without a seam.
Also on the back of the swimsuit patterns there is an additional smooth line for those who sew a swimsuit with a “drop” cutout.
All details are shown with two lines. The inner line is the line for grinding parts, and you need to cut along the outer line.
An arrow is drawn on each part, indicating the warp thread (lobar tissue). When I sew a leotard from supplex or jersey, I cut the leotard along the share, as indicated by the arrows on the patterns. But if I cut a swimsuit from a dense mesh, then I put the patterns on the duck (cross thread).

Pattern printing
Before printing patterns, you need to set up the printer and select the correct print scale. If this is not done, then the dimensions of the swimsuit patterns may not be correct.
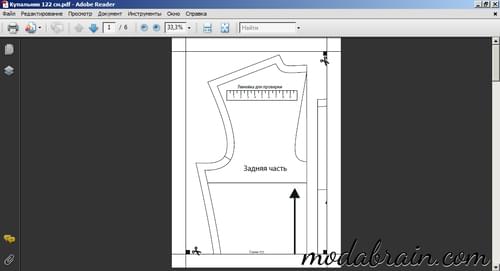
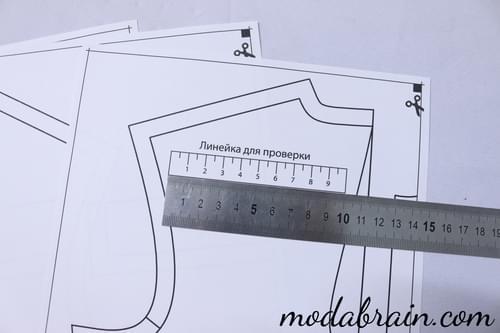
The first sheet of the layout of the swimsuit shows a ruler to check the correct printing. I recommend that you first print only the first sheet, and only when you are sure that the printing is in the correct scale, only then print the remaining sheets.
You need to print patterns only with the help of programs, but you should not print through web browsers, because in virtual printers such as: google printer - there are few settings and it is impossible to choose the right scale.
Pattern printing using Windows
I use “Adobe Acrobat Reader” to print patterns, settings in other programs may differ.
Option 1
-
Open the PDF file with patterns.

-
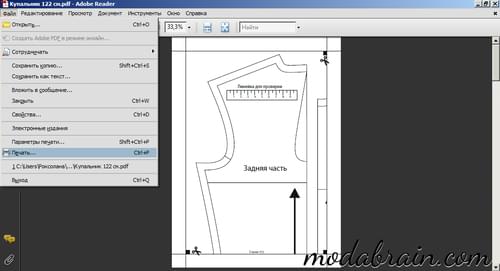
Next on the menu bar, click on File/Print.
-
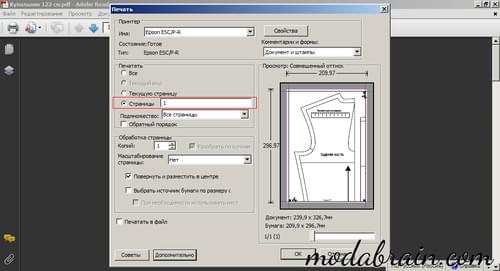
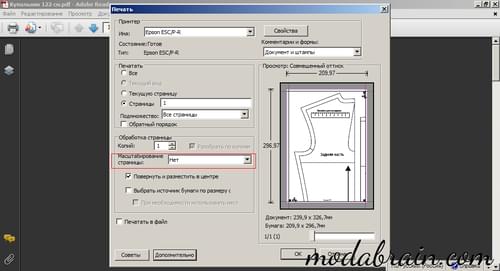
Next, in the “Pages” section, enter “1” to print only the first page with the proof line for verification.
-
In the item “Page scaling” it is necessary to mark “No”.
-
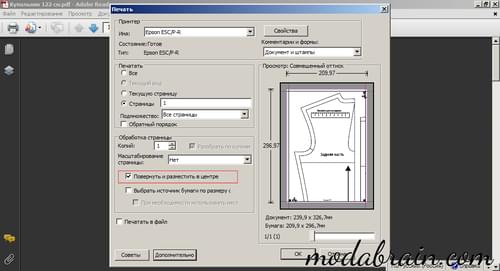
Next, check the “Rotate and place in the center” box.
-
Then click the “OK” button.
-
After printing, check the correct scale by applying a ruler to the drawn ruler on the paper.

Option 2
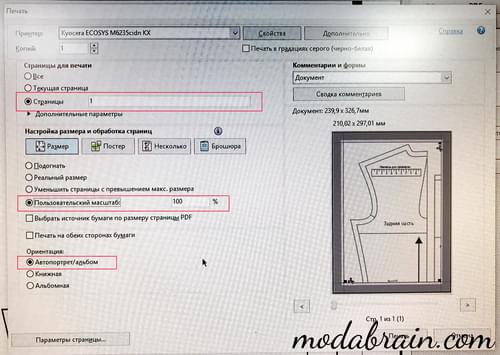
In the same way as in the first option, open the file with patterns, then click “File / Print” in the top menu. In the “Pages” section, enter “1”, then check the box for “Custom scale” “100%”. And in the “Orientation” item, check the box for “Self-Portrait / Album”. Then click the “Print” button.
Print patterns using macOS
-
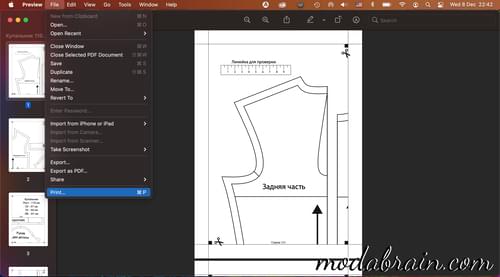
Open the pattern PDF file in the Preview application.
-
Then click “File/Print” on the top menu bar.
-
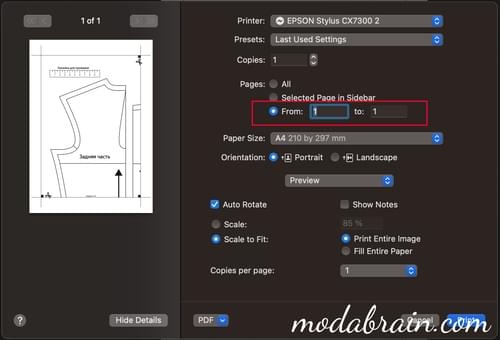
In the settings window that opens, select Print only the first page.
-
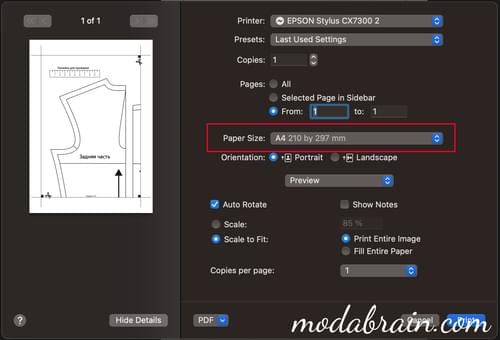
Next, you need to select the page size “Paper size”. Then click on the blue “Print” button in the lower right corner.
-
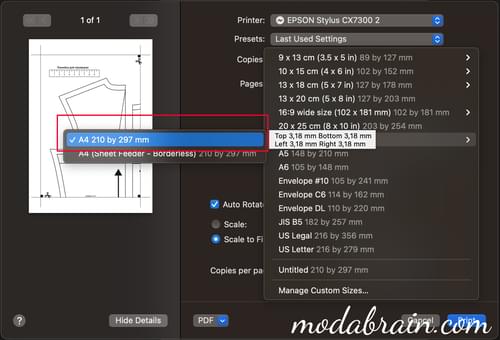
Move the mouse cursor over the “A4” format and an additional window will open where you need to select the top option so that printing occurs with margins.
-
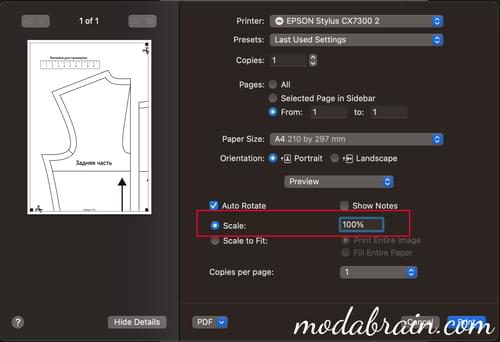
Next, check the “Scale” checkbox, and then enter “100%”. And click on the “Print” button.
-
Then check the correctness of the selected scale by attaching a ruler to the drawn ruler on paper, if the centimeters match, then you can print the rest of the pages. With these settings, the scale should be correct, but if your print is not correct, then simply reduce the percentage.
It is better to check with a metal or aluminum ruler, there are errors in millimeters on wooden rulers. And in no case do not check the correctness of the ruler with the help of a tailor’s centimeter.
Pattern assembly
All sheets are numbered and at the bottom of each sheet the line number is marked, and in parentheses - the column number.
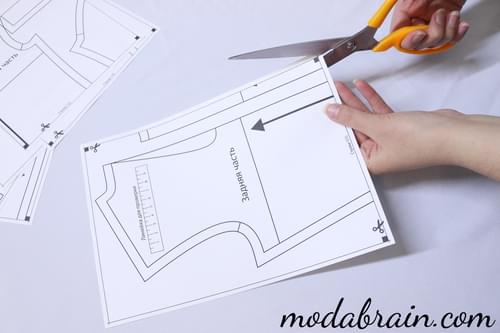
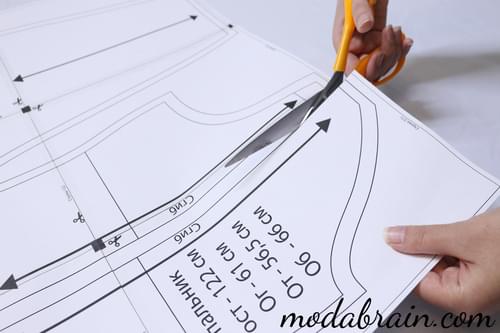
Also on each sheet, scissors are drawn on some lines, and where they are, you need to carefully cut off the excess paper.
This is a diagram of how to lay out sheets of A4 format. The number of sheets depends on the selected size from 6 to 12 sheets.
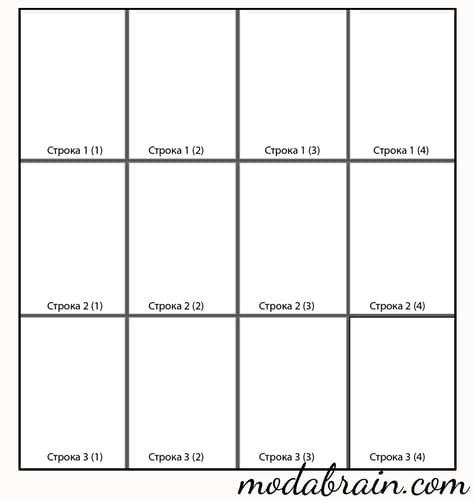
First, I tape the horizontal rows together. You need to connect the lines and black squares at the corners to make one big square. Lay the first sheet on the second sheet, and the second on the third. And so three rows.
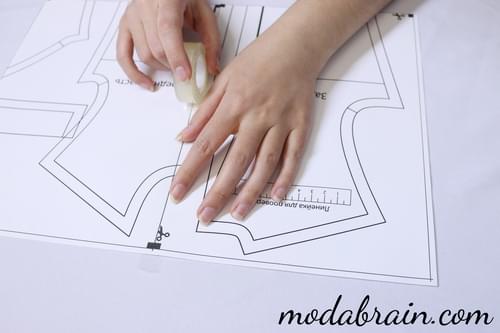
Then I also connect vertically. I put the first row on the second, and the second on the third and glue everything with tape.
Then I cut out all the details of the gymnastic leotard and my patterns are ready.
Change patterns
The patterns of a gymnastic leotard do not have to be used in the form in which they are on the layout. Patterns can be used as a base and based on them, model the model that you need.
The layout has a collar / stand, but you can sew a swimsuit without a collar. The neck can be modeled as you like and you can also make a choreographic neckline and this change will not affect the design of the leotard in any way.
You can change the waist line and hip line - this change will also not affect the design. But a change along the chest line will affect the length of the armhole and, accordingly, the length of the sleeve, so they will also need to be adjusted.
If you need to change the length of the torso, then for this you need to cut the patterns along the waist line and evenly remove or add the required length. But do not forget to adjust the waist circumference afterwards.
Thank you for reading my article. I hope that my gymnastic leotard patterns will help you create the leotard of your dreams. If you have any questions, then ask them here in the comments, and I will try to answer them.